What you’ll need to paint your house like a professional:
1x Angled paint brush
1x Wide paintbrush
1x Resene Primer
1x Sealant (Caulk)
1x Contract filler
1x Masking tape - 1inch thick
1x Roller
1x Caulking gun
1x Electric Sander with 80 grit sandpaper
Loose, fine grit, sandpaper - 180 + 220
Wet sponges
2x Resene Drop cloths
1x Disposable coveralls
1x Resene paint colour (you’ll need to measure your space for the exact amount of paint needed but the Resene team are super helpful if you have any questions!)
1x Ladder
1x Damp Cloth
WEATHERWISE
Not a hot day, and definitely not a windy day. If it’s too hot, the paint dries before you can finish a section and can result in ‘banding’, and if it’s windy then dirt and particles will stick to your beautiful finish.
STARTING THE JOB
Where to start? It seems like a big job, right? Well, the sooner you start the sooner you’ll be finished. (Sorry it’s such a dad thing to say - but it’s true!)
HOT TIP: Buying more expensive brushes (like the ones we were kindly gifted from Resene) is worth the extra dollar because there’s a much lower chance of bristles falling out and onto your freshly painted surface.
BELOW: Renee from Resene in Kilbirnie kindly labelled each product for us so we didn't confused - the additional products we luckily didn't need (yet!) are optional additives to slow the paint drying (if it's a very hot day). HOW TO PRIME YOUR HOUSE
If your house was recently stripped, you need to ensure there’s a smooth enough finish for the paint to glide on top of. To do this, set up your drop cloths, grab your electric sander, and sand every surface it can move across on, evenly. Ensure - by feeling across the boards - that there are no paint flakes or rough patches as this will show through the final paint coat and you will REGRET IT! Haha.

THE IMPORTANCE OF SANDING
Once you have sanded all the faces of the weatherboards (or if you don’t have weatherboards just ignore this part) then grab your 180 sandpaper (the higher the number the finer the grit FYI hons) and ensure to go UNDER every weatherboard as well as on top to ensure a smooth finish. 
If you don’t go underneath the weatherboards properly - because in some areas it IS really difficult to strip and sand completely, the paint will ‘pool’ and drip down from any residual paint flakes - for example around our hose pipe outside it was hard to strip and sand and we had to monitor the constant dripping - #DripAnxiety is a thing! 
CLEANING MATTERS
To ensure seamless paint coverage, remove all dirt, sanding dust and buildup form the exterior by wiping down the house with a damp sponge. Ensure this dries. Grab your primer (we went to Resene in Kilbirnie and I can’t say enough HOW AMAZING Renee - the paint shop assistant was! She helped us with absolutely everything and answered every question professionally, she made us feel like every question was okay to ask - which was awesome because as a newbie I’m sure I asked a lot of silly ones!) And mix it before starting. Ensure you mask around the windows using the masking tape (allowing room for painting 1-2mm on the window to ensure it sticks).

HOW TO USE A PAINTBRUSH
When we started, I wanted to use a foam roller. However, Adam and his parents both said a brush will be easier and give you the same finish. I disagreed until Renee from Resene had the same feedback, and I then gave in to the brush.
When painting the primer on, we went one weatherboard at a time (moving fully across the house working from the top down) to avoid banding and dripping on pre-painted areas. To get an even finish; paint gently and start with thin coats - still covering the surface. Ensure as you go along the weatherboards, that you aren’t missing the underside of the boards. All exposed wood must be painted with primer. Don’t worry too much if your coat of primer has visible brush strokes - consider this your practice round.
HOT TIP: Ensure you leave your windows fully OPEN whilst any coat is drying.


HOT TIP: Remove any masking tape before allowing the primer to dry, otherwise the tape can pull off chunks at a time - we experienced this when painting the front door! We also used a retractable knife to cut the tape and ensure clean edges - top and bottom. I also found that using the angled brush around detail areas, such as windows, gave a better finish and using the wider brush helped provide a seamless finish on the weatherboard faces - although BE WARNED: the bigger the brush, the heavier it is.

SEALING
Once the primer has dried, walk around the exterior and take note of any and all; chips, cracks, uneven edging, etc. Fill these imperfections with Caulk/Sealant/Contract Filler. Check the instructions on each product to see which is best for which surface level you are filling, also - some of them have certain dry times before/after painting/priming so double check these before you start! Use your sealant and wipe off any excess product from surrounding surfaces with a damp cloth. 


HOT TIP: I found it helpful to use the damp cloth to shape any edges, such as corners of weatherboards that were damaged or broken. We also filled our front door step, which had been chewed up courtesy of Boki, and also some of the underside weatherboards where the top and bottom section met - basically ALL GAPS MUST GO! The reason for this is because after you’re done painting (especially if you’re doing a lighter colour) it looks like a very dark shadow and will annoy you. Every. Time. You. See it. 

 POST-PRIMING
Now guess what’s after priming? Sanding! Again, you say? Yes, I know - it’s tedious. BEEN THERE HON! Just remember how much you’re saving and what you’ll spend it on instead. Grab your 220 grit sandpaper, and lightly go over the primer to ensure it’s completely smooth, this also creates a texture that helps the paint adhere. Sand all of the sealant to ensure it looks seamless.
Wait until your primer has completely dried - follow the instructions. Re-sponge and wipe down all surfaces to ensure they’re clean before painting.
PAINTING THE HOUSE
Re-mask your windows with masking tape. Now it’s the fun part! If I were you, I would paint one weatherboard with your chosen colour of paint, and let it dry.
HOT TIP: When choosing paint for exterior, keep in mind the glossier the paint the easier to clean - but the more errors that show. And visa versa for a matte finish. We went with semi-gloss because Boki is forever shaking her dirty little booty in front of the house covering it in filth (not for long because we have a deck to build woohoo!) but we were also concerned we may not stack up to professional painters - I think you'd be fine either way.
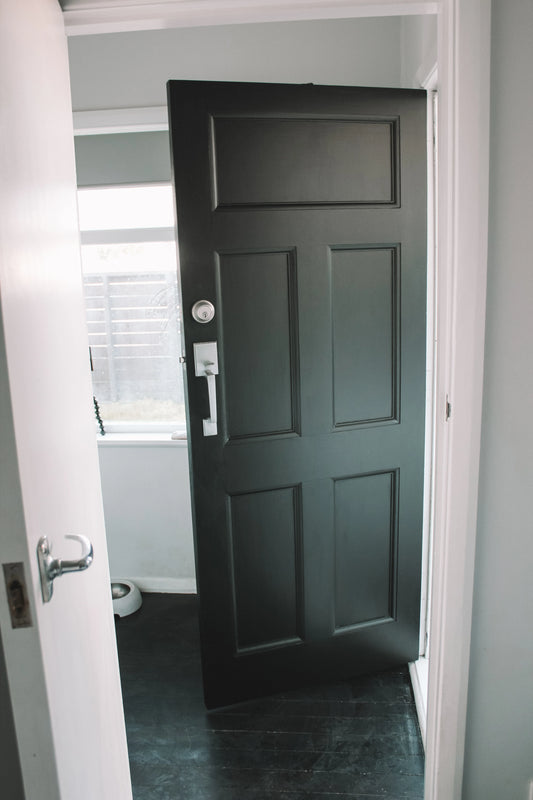
Ideally one entire weatherboard to avoid banding. Why? Because we painted our entire house, two coats of paint and all - and the colour was too light. It was so light that it looked like we still had primer on, because direct sunlight is blue which reflected onto the house. We went back to Resene and their super helpful staff helped us mix our original colour Athens Grey into a triple Athens Grey, which was almost the right amount of contrast for what we had in mind, they then very kindly mixed us a CUSTOM colour (they said it resembled a quad Athens Grey) because we needed it ever so slightly darker again - the team down at Kilbirnie Resene were awesome at helping us! Our window trim was Alabaster (white) and our front door is Nero, which is a matte black.


I hope this inspired some of you reading to paint your homes yourself - any questions please hit me up! :)
Also a massive thank you to Resene who generously supplied us with paint and accessories. Stay tuned for the next blog to come - we have a lot to do, including building and staining a deck! See pics below for our thoughts moving forward - I'm gunning for the black look whilst Adam is going towards light - what do you think?


Good luck!
Chat soon,
S x